There’s nothing quite like the smell of fresh, homemade bread baking in the oven. This classic homemade bread recipe yields a loaf that is soft, fluffy, and perfect for everything from sandwiches to a simple buttered slice. It’s an easy, straightforward recipe that doesn’t require any fancy equipment or ingredients, yet results in the most comforting, delicious bread you’ll ever make.
Ingredients:
- 4 cups all-purpose flour, plus extra for kneading
- 1 packet (2 1/4 tsp) active dry yeast
- 1 1/2 cups warm water (about 110°F/43°C)
- 1 tbsp sugar
- 2 tbsp unsalted butter, melted (plus extra for greasing)
- 2 tsp salt
Instructions:
Step 1: Activate the Yeast
- In a small bowl, combine the warm water and sugar. Stir to dissolve the sugar.
- Sprinkle the active dry yeast over the water mixture and stir gently. Let it sit for 5-10 minutes until it becomes frothy and bubbly. This step ensures that the yeast is active and ready to help the bread rise.
Step 2: Mix the Dough
- In a large mixing bowl, combine the flour and salt.
- Once the yeast mixture is frothy, pour it into the flour mixture along with the melted butter.
- Stir the mixture with a spoon until it begins to form a dough. Once it starts coming together, use your hands to knead the dough in the bowl until it is smooth and elastic, about 8-10 minutes. If the dough is too sticky, sprinkle in a little more flour; if it’s too dry, add a teaspoon of water at a time.
Step 3: Let the Dough Rise
- Lightly grease a clean bowl with a bit of butter or oil. Place the dough in the bowl and turn it to coat with the butter.
- Cover the bowl with a clean kitchen towel or plastic wrap and let it rise in a warm place for 1 to 1 1/2 hours or until the dough has doubled in size.
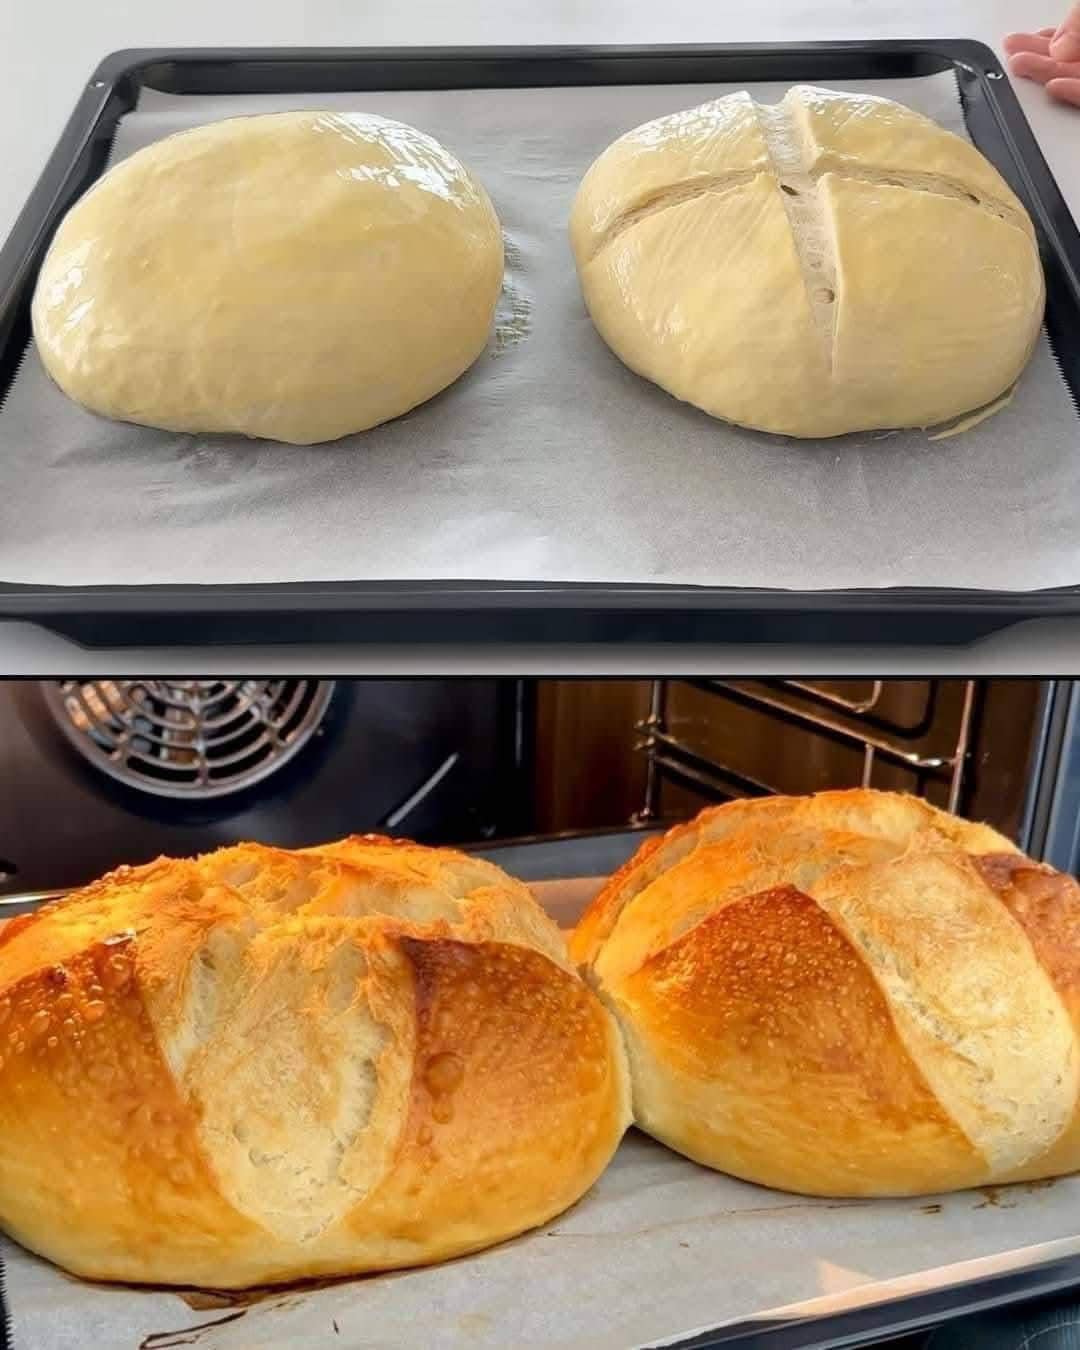
Step 4: Shape the Dough
- Once the dough has risen, punch it down to release any air bubbles.
- Turn the dough out onto a lightly floured surface and shape it into a loaf. To do this, fold the edges of the dough towards the center, then roll it up tightly. Pinch the seams to seal it and tuck the ends under to form a neat loaf shape.
Step 5: Second Rise
- Grease a 9×5-inch loaf pan with butter and place the shaped dough inside.
- Cover the pan with a towel or plastic wrap and allow the dough to rise for another 30-45 minutes, or until it has risen about 1 inch above the top of the pan.
Step 6: Bake the Bread
- Preheat your oven to 375°F (190°C).
- Once the dough has risen, bake it in the preheated oven for 25-30 minutes or until the top is golden brown and the bread sounds hollow when tapped on the bottom.
Step 7: Cool and Serve
- Remove the bread from the oven and let it cool in the pan for about 5 minutes. Then transfer it to a wire rack to cool completely before slicing.
- Slice and enjoy with butter, jam, or as a base for your favorite sandwiches!
Tips for Success:
- Warm Water: Be sure the water is warm, not hot, as temperatures over 120°F can kill the yeast. If you don’t have a thermometer, aim for a comfortable warmth when you dip your finger in.
- Kneading: Kneading the dough helps develop gluten, which gives the bread its texture. If you’re using a stand mixer, you can knead it with the dough hook for about 6-7 minutes.
- Proofing: If you’re in a cooler environment, you can let the dough rise in a slightly warm oven (turn the oven on for a few minutes, then turn it off and place the bowl inside).
- Soft Texture: For an extra soft loaf, you can add a tablespoon of honey or milk in place of some of the water, which will give the bread a tender crumb.
Why You’ll Love This Bread:
This classic homemade bread is the ultimate comfort food. The result is a loaf that’s golden, soft, and perfect for any occasion. Whether you’re enjoying it as a side for a hearty soup or just having it with butter for a simple snack, this bread is as versatile as it is delicious. The steps are simple and the ingredients are easy to find, making it a perfect go-to recipe for anyone who wants to try their hand at homemade bread for the first time—or anyone looking for a no-fuss, satisfying loaf of bread.